1 MINUTE VEX VII
OCIO Transformed Attribute From Image
OCIO and ACES are tricky subjects to explore if you are not familiar with why they are used or what they do in principle. If you are interested in understanding them more, feel free to read these great write-ups on both:
OCIO support in Houdini - A brief overview on OpenColorIO in Houdini
An Idiot’s Guide to ACES - An artist friendly guide to ACES in Houdini
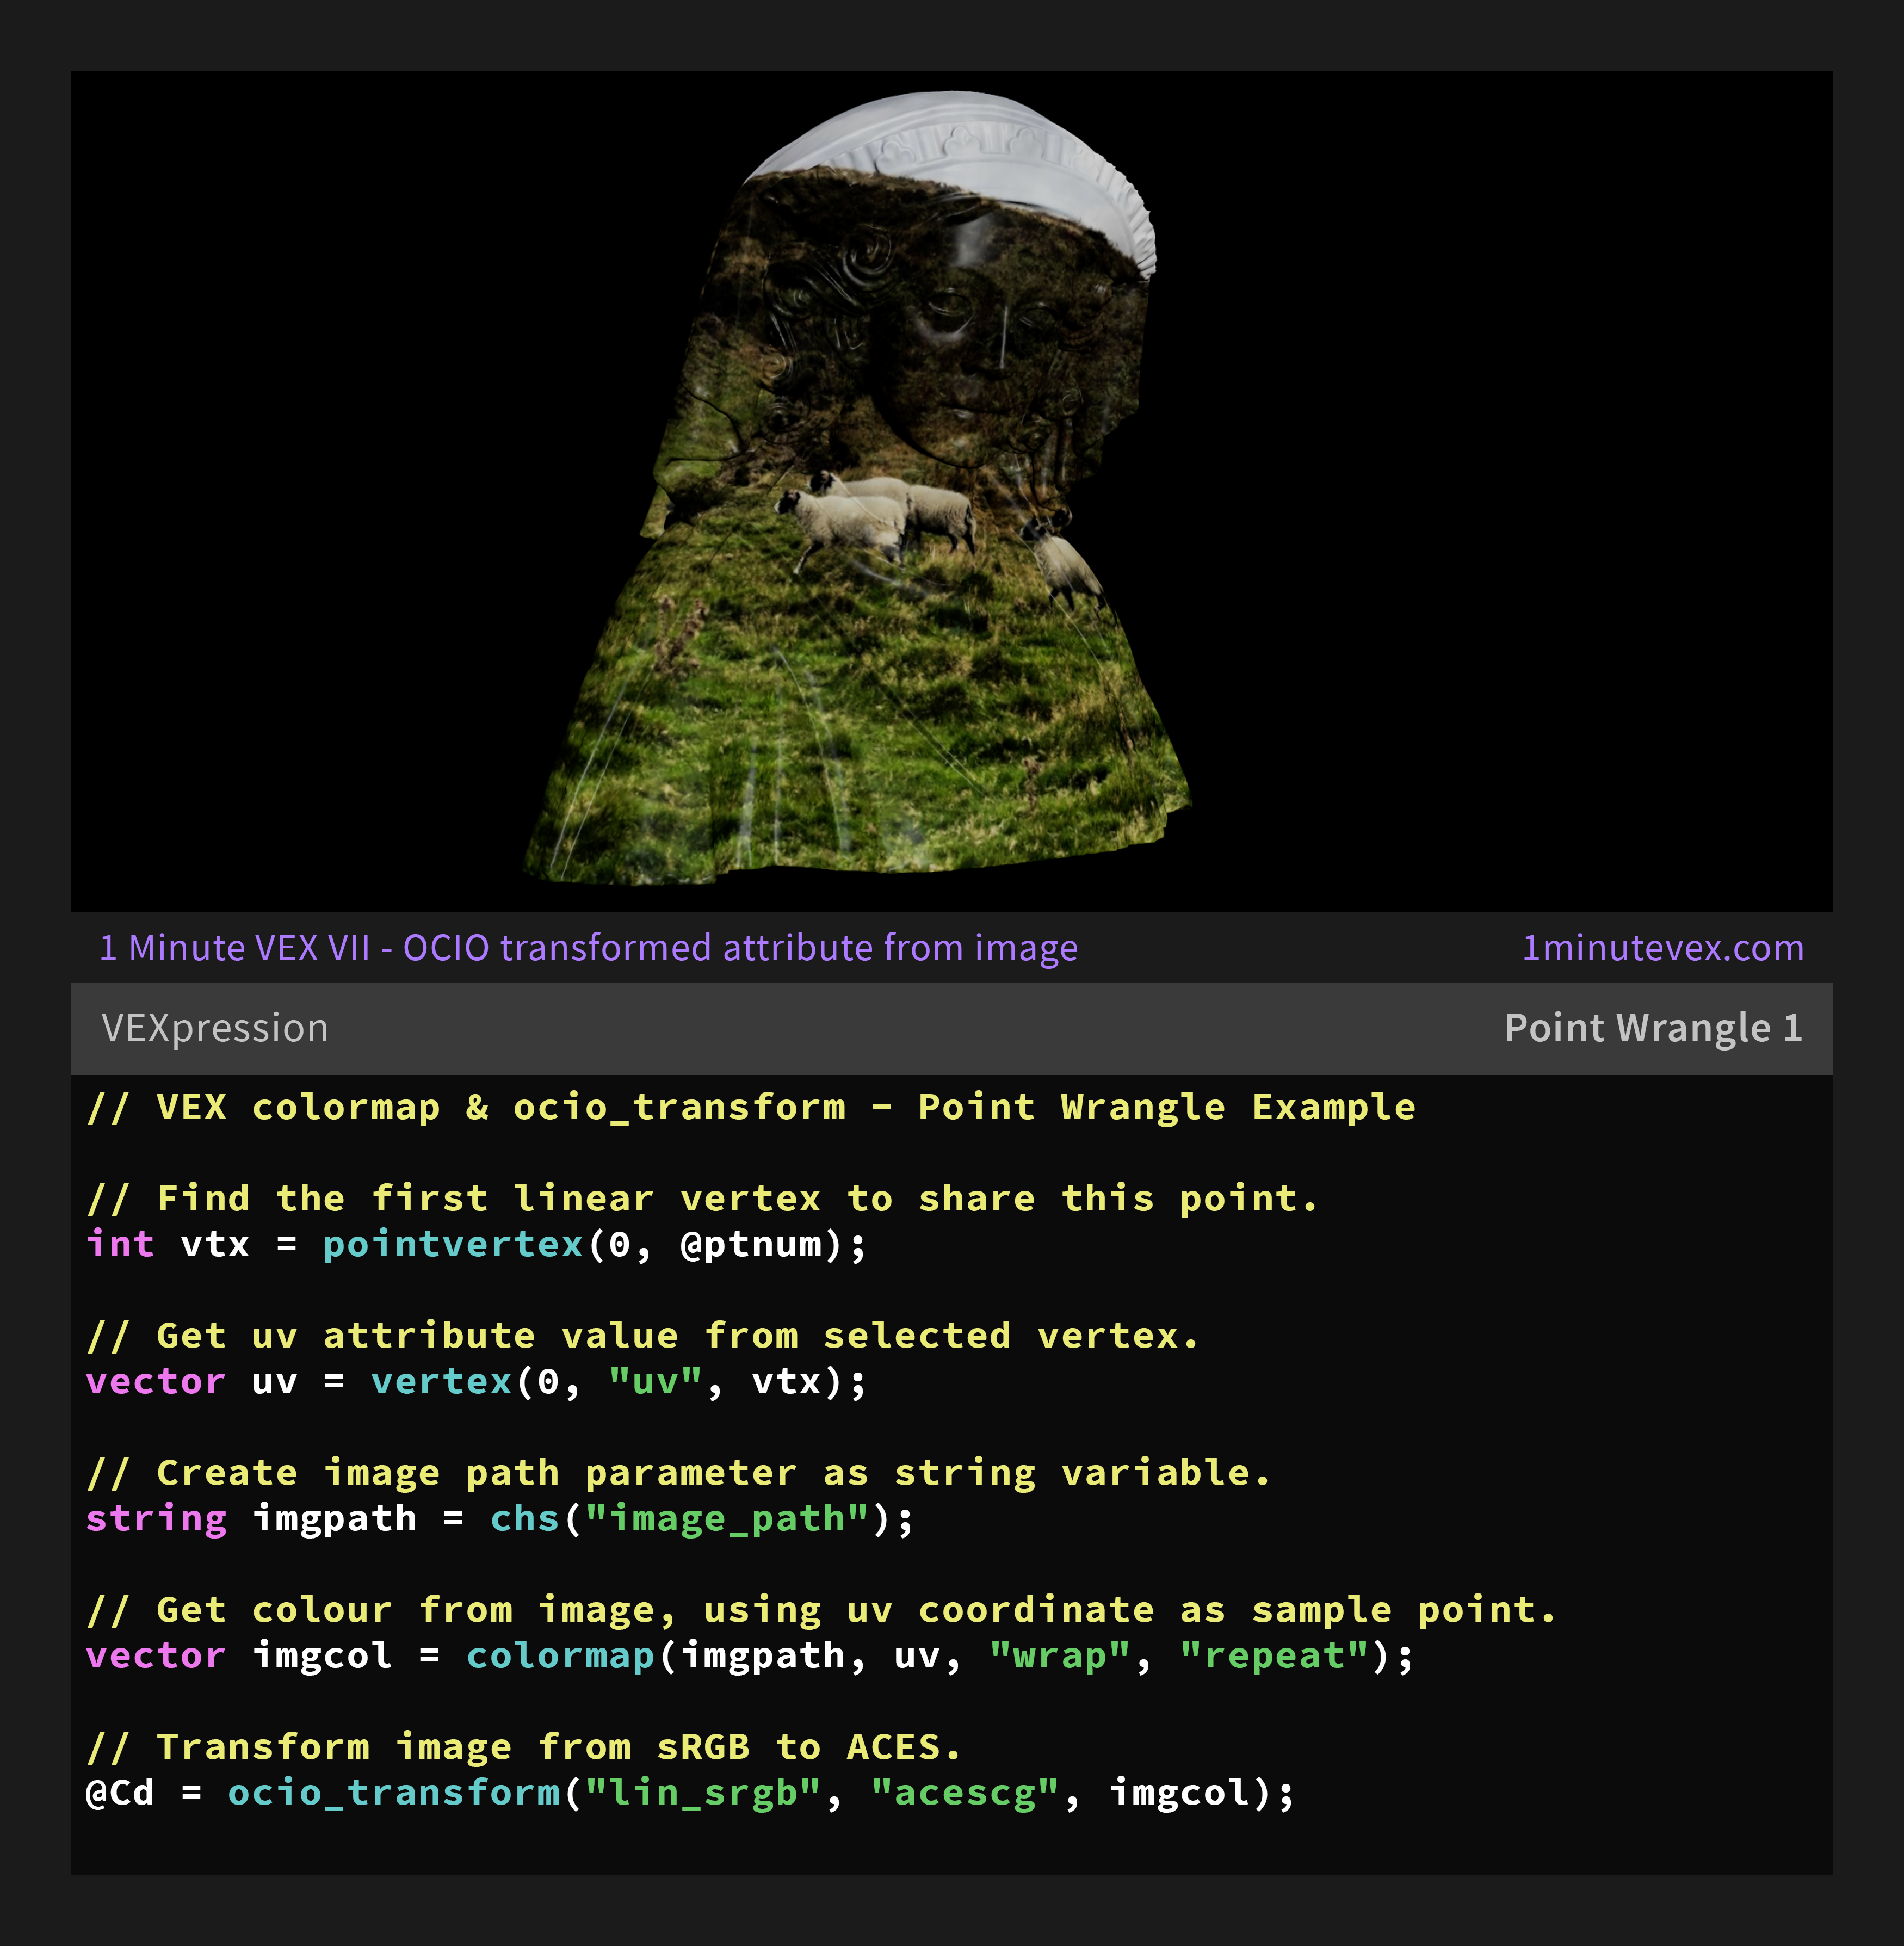
In this example, we begin by finding the first linear vertex sharing the point we are currently iterating over. We can then use our vertex number to get the associated uv attribute value.
The reason we extract uv with this method and not by simply typing @uv is because we would otherwise be promoting uv to point from vertex- which can create a range issues later on.
We then create a string channel to use with a disk path to our image; And with this we have all of our initial variables. Using the colormap function, we can get a filtered position on our image and use a very convenient syntax to specify what behaviours we might want the image to adhere to. In this example, the image is set to repeat outside of the uv boundaries.
However, our example image is a jpg, natively in the sRGB colourspace. If we are using another colour-space such as ACES, we will want to correct our now-linearised values appropriately. Using the ocio_transform function, we convert our colour vector from linear sRGB to ACESCG.

